Nice to see you again, Harper.
Thanks. You too.
Where would you like to start?
First, I’d like to say that what I am covering here is not a ‘How To’ guide. This is just my personal experience on my journey from ‘Blank page to Bookstore in 2024!’ I hope it might be useful to someone out there, but I’m not suggesting anyone does what I did.
Would you like to remind us what #BlankPageToBookstore is all about?
Sure. I have written hundreds of short stories and poems and 23 novel manuscript. But, I have never published a novel. And I have never (at least until this year) had an ‘author platform,’ you know… a website, social media and all the rest.
In 2024, I will write a book and publishing it… either through traditional publishing or self-publishing… whichever comes first.
I thought a lot of authors wrote a book in a year. Isn’t that why Stephen King started writing under an alias… so he could write more than one book a year without saturating his own market?
Yes, some author’s are very prolific, and sometimes they share great insights into their writing process afterwards. Stephen King’s wonderful book on writing called ‘On Writing’ being a great case in point.
What’s different here is that I will be documenting every step of my journey from blank page to bookstore in real time… as I go… in a weekly blog… outlining ever important decision I make, every single step I take.
I will share my evaluations and decisions on writing, website and social media tools and how I go about establishing my ‘author platform.’ I will also go into great detail about my actual journey of writing and publishing my book.
Sounds good. How’s your journey been this week?
This week, I built a website and set up a blog and launched them to the world.
Sounds like a quiet week.
(Laughs…) it wasn’t. It was honestly one of the hardest weeks of my life.
That sounds a bit melodramatic.
Yes, it does.
(Waits…) cool… okay… would you like to step us through the highlights?
The main steps were pretty straightforward. It was the decision making that was the hardest part… well… other than a whole lot of upskilling in web, blogging & social media tools and processes.
My prior experience with web design and tools dates back to about 2003, pre-stone age in computer terms, so I spent a whole lot of time Googling and prodding ChatGPT and reading Reddit reviews to help me to craft a website and blog building plan.
The result of all that was a comprehensive plan that seemed daunting… and proved to be that an more. In hindsight, I really should have given myself 2 or 3 weeks for this part of the journey, but I didn’t want to throw out my overall schedule in the first week of real work, so I put in a lot of late nights and made it happen.
Can you tell us about your web development and blogging plan?
How about I talk you through each step?
Okay, where would you like to start?
Let’s start with… step 1.
Always a good place to start.
(Laughs…)
Step 1: choosing an overall web/blog platform
Choosing the web/blogging platform was more complicated than I thought it would be. After a lot of Googling and prodding ChatGPT, I decided there was one fundamental decision I needed to make that would impact the way I managed my website/blog forever. I needed to decide what type of website/blog platform I wanted to work with.

What are the types?
At a high level, there are three general categories of website/blog platform:
Self-hosted: choose my own hosting service and build my own site and manage all aspects of my site (or pay someone to do those things for me).
Hosted: use an integrated hosting service that comes with a comprehensive set of templates and tools to make the process simpler. I’ve included subscription blogging services like Blogger in here as they are fully hosted and integrated (though they don’t provide full website functionality).
Hosted AI: (the new kid on the block) hosted with AI-based site generation.
That seems like a no-brainer, doesn’t it? Surely you want to make life as easy as possible for yourself and get a Hosted solution – if not Hosted AI?
Yes, it did seem that way at face value. But, as is often the case, simplicity has its downsides… namely lower flexibility, reduced control and increased cost. Though, these might be easy tradeoffs for simplicity, depending on your needs.
So, which way did you go?
Well, I looked through most of the leading (i.e. popular Google results and ChatGPT and Reddit recommended) self-hosted options first and WordPress still dominates this field. Over a third of all websites are built using WordPress worldwide.
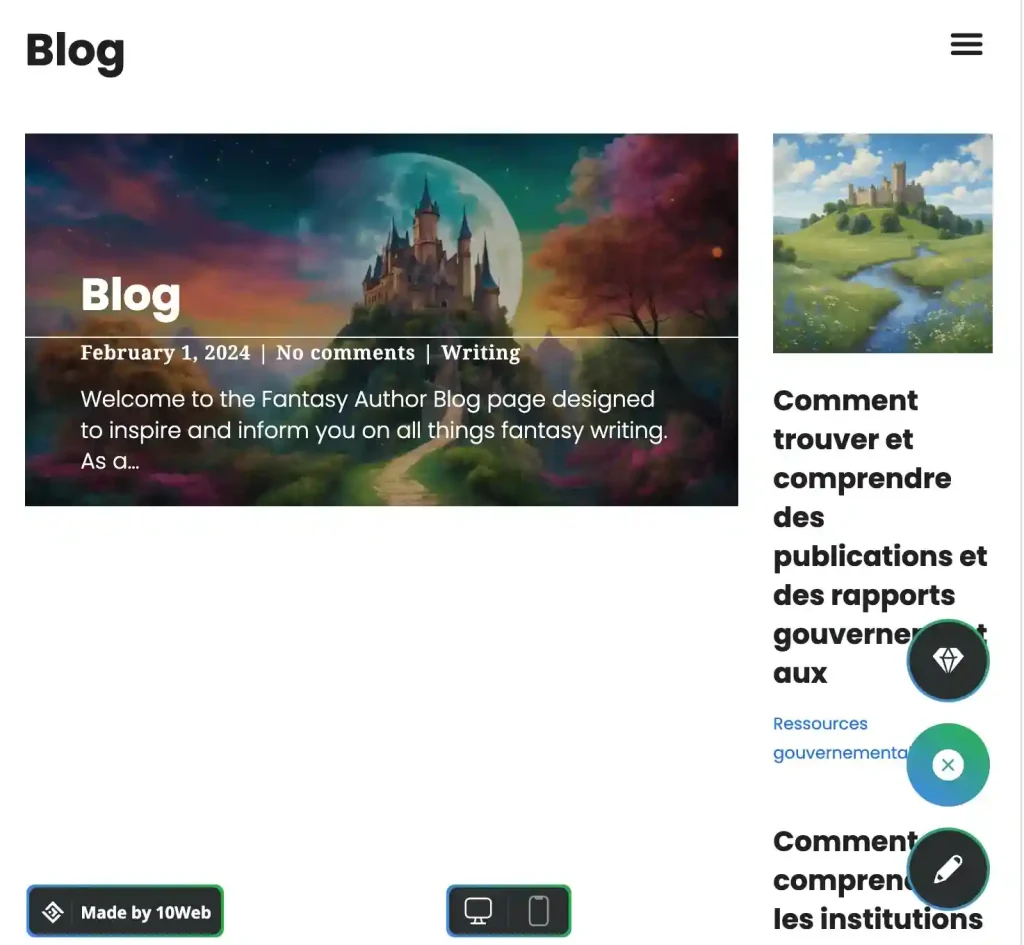
The Hosted solutions also have clear leaders like Wix, Weebly and SquareSpace. Some of these also have some AI capability built in. But another class have even more comprehensive AI-building functionality, and the leader of these seems to be 10Web at the moment, where you can build an entire website from a single text prompt.
Seriously?
Seriously.
Wow.
Yeah… how about that?
Like, really…. wow!
(Smiles and nods…)
And so, did you build your website from a text prompt?
Yep, I built a website. Who wouldn’t? It was literally a single sentence of text, and 10Web built a functioning website.
I thought you said it was a hard week.
(Laughs…)
Did you go with 10Web, then?
No. The raw site wasn’t really what I had in mind. I could have edited into what I wanted, but I had a very clear vision for the site, and the reviews of 10Web said the editing tools were a little limited, so I was concerned I might not be able to create exactly what I wanted.
So what did you do next?
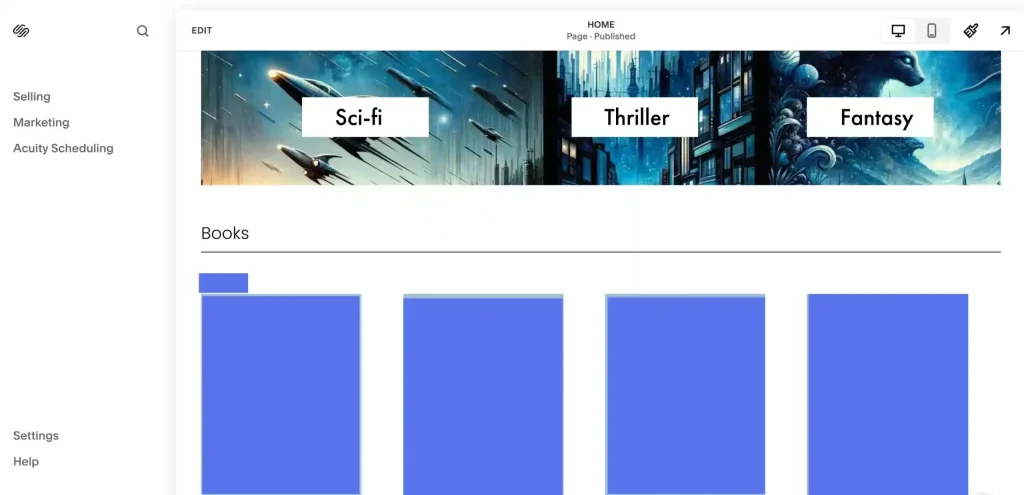
Next, I built a site on Squarespace. 10web and Squarespace both have free trials, by the way, so this was all without any out-of-pocket expense.
Why Squarespace? You said there were plenty of options in the Hosted category.
Yes, there are heaps. I decided early on that I wanted a full website, so that ruled out tools like Blogger. Though, such tools seems like a great option for just a blog. Then, I narrowed down the hosted solutions to those with the highest adoption and best reviews. Still a healthy list of contenders.
Eventually, I was swung toward Squarespace when reviewers kept comparing it to Apple products. It is not an Apple product, but the point is that it supposedly works as simply and intuitively as Apple products do.
Sounds good. Dit it?
Yes. It was very easy to spin up a site and start editing it toward what I had in mind.
So you went with Squarespace?
Almost. I was very tempted. It includes the domain and domain name hosting and website hosting and editing and maintenance and security and all the rest all rolled up in one neat package. It would have been very easy to just start paying the $20 USD a month and finish the website and hit publish.
And yet… it sounds like you didn’t do that.
No. I didn’t.
Why not?
Because every one of the dozen or so templates from SquareSpace I tinkered with just made me want to strip out all the bells and whistles until there was pretty much just a blank landing page that I could build up from.
Why would you do a thing like that?
Because I’m not a clothes store or a real estate agent or an influencer or a DJ or any of the other hundreds of genuinely impressive templates on offer… and there really wasn’t a good starting point for the very simple, old-school author’s website I had in mind.
The page building was pretty straightforward once I’d stripped the templates back to bones… dragging and dropping images and functions, but I couldn’t do everything I wanted with the design, and it felt like there was a whole lot of functionality that I would end up paying for that I didn’t really need.
So then you tried some self-hosting tools, I suppose?
Yes.
How did that go?
It was very daunting at first. There are ten gazillion domain hosts and domain name services and web hosts and content hosts and mail hosts and tools and plugins and widgets, and… the list goes on. It really was hard to know even where to start.
Why would you bother? Why not just stick with SquareSpace or something?
I almost did, like I said. But, I had a very clear vision, and I was worried I might not get there without the very flexible platform self-hosting provides. Plus, I wasn’t entirely convinced about committing all parts of my website/blog to the one service provider forever.
There is currently no easy way to export out of Squarespace. Once your site is there, Squarespace is your host for the life of the site. You want to move, you need to start building again from scratch.
Still, if it has everything you need?
Yes, but I wasn’t sure it did. I needed to play around with self-hosting before I decided.
So, what did you do next?
Step 2: choosing a domain name
Next, I chose a domain name.
Sounds straightforward. Don’t you just register your own name?
That’s a good option, but most people’s names are already registered… it’s a wide, wild world.
Then don’t you just add ‘books’ or ‘author’ or something after your name?
Yes, that’s another good option. Many authors do that. It even sometimes helps with the targeted branding of yourself as an author.
But…
Well, it’s not so much a but as an… also. Also… there is the option of using a pen name.
Why would you want to do that? Shouldn’t you be all over social media as a real person so people can relate to you?
Yes, a lot of people seem to say that.
But… you went with a pen name?
Yes.
Okay, what name did you choose?
Harper Stonewood.

Oh… so Harper Stonewood is really your…
Yes… Harper Stonewood is my author name… not my birth name. I did stick with my actual photo for the website. Though, I filtered it in keeping with Harper’s style.
Still not sure why you’d use a pen name. Don’t you want the fame and glamour of your own success?
(Laughs…) I’m prepared to risk my… ah… glamour. It has been common practice for a long time for authors to use pen names. Mark Twain was born Sam Clemens. Lewis Carroll was born Charles Ludwidge Dodgson. Anthony Afterwit was born Benjamin Franklin.
That Franklin-Afterwit thing sounds like a whole blog post in itself. Let’s park that for now. Still not sure why you didn’t you use your real name. Surely, it would be easier to build a readership around you as a real person.
I am a real person. I’m just choosing my branding. I decided to go that way for a bunch of reasons. To separate my artistic and day-to-day life. To choose any name I like. To secure a unique domain name (my birth name is already taken). To have an adventure.
And, the clincher, this whole #BlankPageToBookstore thing is about starting from nothing to stand up everything I need to publish a book in a year. It makes sense that I start from the very birth of my author persona.
Why Harper Stonewood? How did you come up with that? Doesn’t seem like something you can really Google. More sort of an anti-Google. Trying to find a name you don’t want to be able to find so you can claim it.
Yeah… wow… choosing the name took a long time. I researched and deliberated and second-guessed myself and built lists and counter lists and started over countless times.
I wanted something ‘authory’ and catchy but not so obvious that it was already taken, preventing me from securing the domain and the socials under that name.
You’d be amazed how many names are already registered on the primary social media platforms.
It took at least three days, doing almost nothing but searching and narrowing down and starting over and searching and narrowing down… etc, before I settled on Harper Stonewood.
I am very happy with the name. I love the musicality of Harper and the earthiness of Stonewood. And they roll off the tongue nicely together. And the domain and socials were all mine for the registering.
Step 3: choosing a domain registrar
Did you registered the domain?
Yes.
Was that straightforward?
No.
Why not? Don’t you just log onto GoDaddy and put in the details?
Yes… GoDaddy is the registrar most people think of, but I read enough horror stories on Reddit to give them a wide berth.
But just about every website seems to have a link back to GoDaddy.
Yes, I learned about that as well. Many websites these days are just fronts to get you to click through to their affiliated links. They generate content that is in some way useful… or at least useful enough to get them high rankings in Google. Then they try to convince you click through to an affiliated link.

These referrals can be very lucrative for the referrer. But that also means, when you click through and sign up with the registrar you’ve been referred to, that you are paying a higher fee for a reduced service because the service has to pay those referral fees.
I know that’s how the online world works, and that’s okay… to an extent… but I read many horror stories on Reddit about how GoDaddy upsells services to people who don’t need those services (and that other registrars offer for free). I didn’t know how true it all was, but it was enough to steer me away from the ‘household name’ registrars.
On the flip-side, some companies seemed to be very well-regarded. NameCheap and Porkbun being the front runners. In the end, I went with a smaller company called Hover.
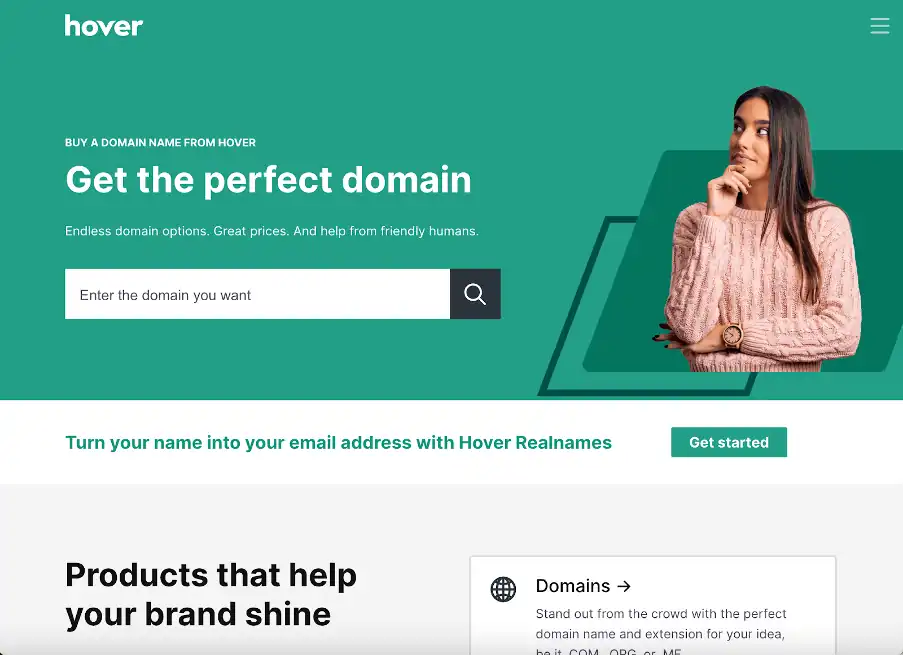
I went with Hover because they have very good reviews, but also because they are only a registrar and an email service provider, so they are not going to try and upsell me on a bunch of stuff I don’t need. They were a few more dollars at $18 USD for a year of my domain name. Though, they don’t massively increase the price after the first year like most registrars. I’m happy to pay a few extra dollars to avoid the upselling hassles.
An important tip I read often was: after registering, put a reminder in your diary for the annual renewal. Sometimes, reminders from your Registrar go to junk mail. If you miss your extension date, the website becomes public again and someone else can buy your domain! I bet Google has several reminders in several calendars for Google.com.
Are you doing one of those affiliate referral things here for Hover? Is that what’s happening now?
No no. I have no affiliation with any company. And I am not providing any clickable links or reference codes or anything else, so there is no reference back to me. I am not recommending that anyone else go with Hover or do anything else I do. I am just explaining my own journey and my own decisions.
So, how was the registration process?
Very straightforward. I put in some details, paid through my card associated with my Google ID and the domain was secured in a few minutes. It was a bit of a relief actually… as one of the rumours is that when you start searching to see if a domain is free, bots… or the registrars offering the domain search service… can secure your domain and then charge you an increased fee to buy the domain back off them.
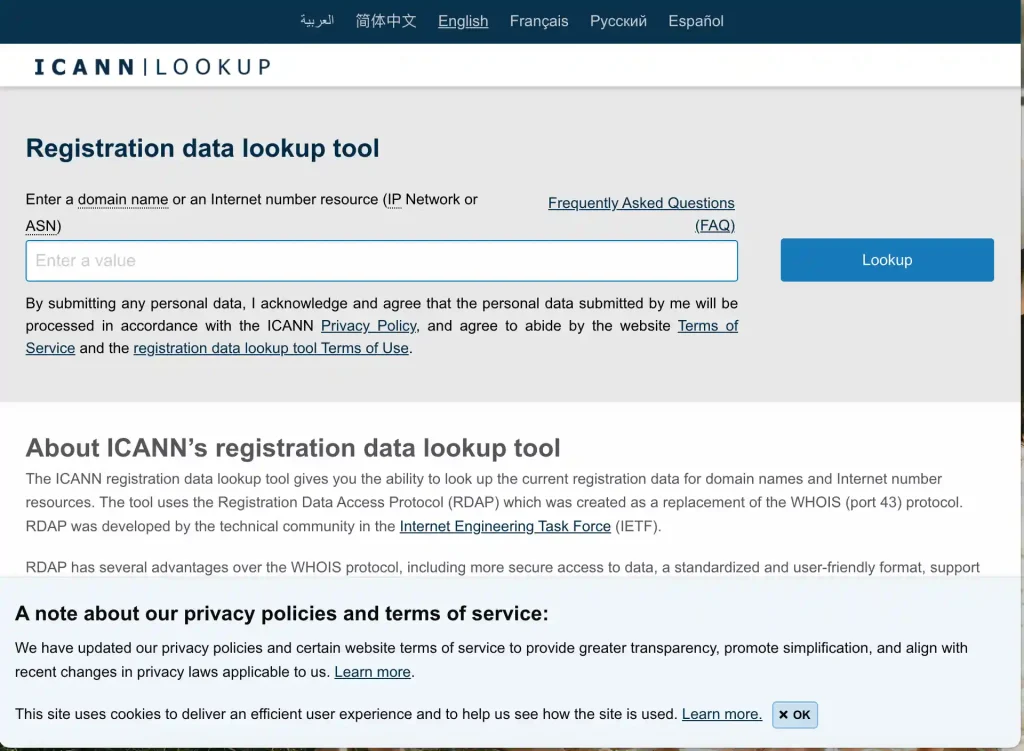
I read that the only safe place to search is the official lookup from ICAAN… the organisation that manages domain name rules and regulations across the internet. So, that was what I used and it was all good.
That sounds pretty wild west.
It does, doesn’t it?
So, if I’m following right, now you have a domain, presumably HarperStonewood.com, hosted on the Domain Registrar Hover. What next?
Step 4: choosing a website hosting service
Next, I needed to choose a hosting service for my website.
Oh, is that different to the domain registrar thingie?
Yes, there are a few pieces to the self-hosting puzzle. The three biggest seem to be the Domain Registrar, the host for your DNS (Domain Name System – the computers that look up your internet address to find your website) and the Host for my website.
The consensus seems to be to keep the Domain Registrar separate and keep the Domain Names System hosting and website hosting with the same hosting service. Though, not everyone does this. And the integrated hosts like Squarespace obviously have all of this in the same place. In my case, I already had a Domain Registrar (Hover), so now I was really choosing a DNS and Web hosting service combined.
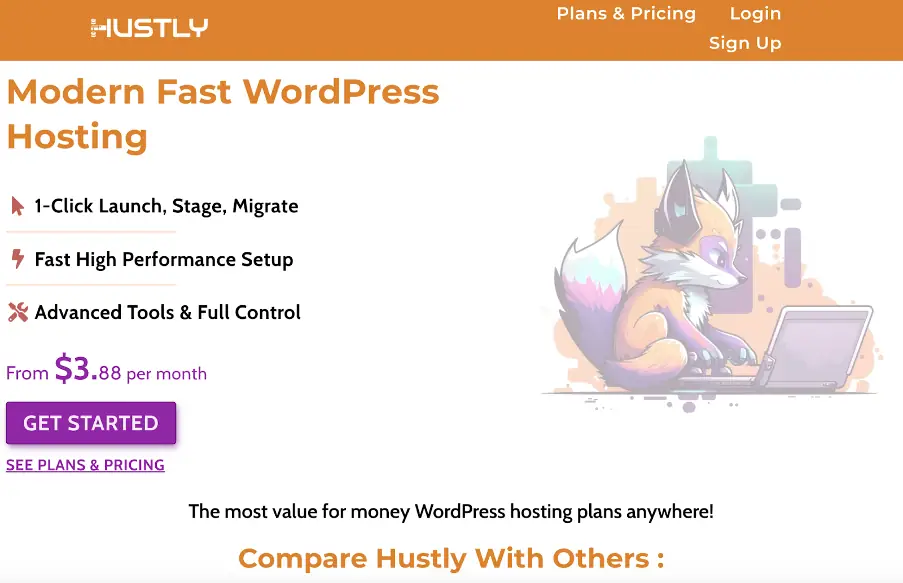
There are many, many, many contenders for website hosting. In the end, I again went with a smaller company called Hustly. I chose them because they were well reviewed, they’re cheap… $69 USD for a full year of hosting, they don’t have a ridiculous escalation of the price after the first year, they use fast, cloud-based computer services… they piggyback off other service providers to do that, but I don’t care about those sort of technicalities… and they seem to be a small, nimble, responsive company.
If I was an established online store or something, that might all seem a bit too risky, but I have nothing to lose yet, so cheap, fast and nimble is what I went for.
So you had to sign up for all of that just to try out self-hosting?
Yes. I thought I had to… so I could set up WordPress and start building a website. It turns out there is a thing called Local WordPress that lets you install WordPress and all the themes and plugins you like on your local machine, which is what I ended up doing to build and testing the website and blog.
So… I could have built the whole website without signing up for a domain or host or anything. But hey… $100 was a pretty small risk in the scheme of things… even if I had to bin the whole thing in the end.
So, did you?
Bin it? (Laughs…) not so far. I built a working site just like the one I envisioned.
Talk us through that.
Step 5: making a website landing page
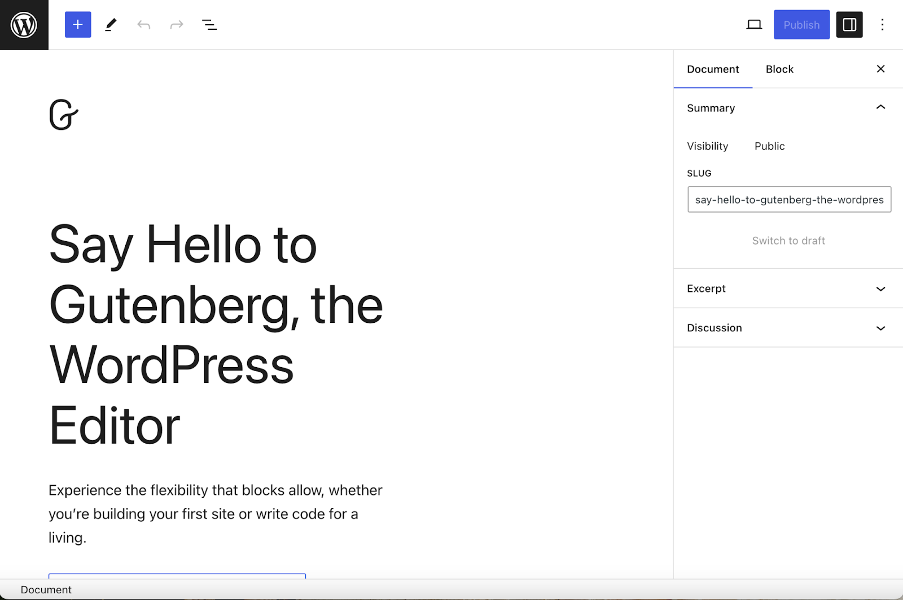
First, I downloaded and installed local WordPress from localwp.com. All free, all easy to do. Then I messed about with WordPress for maybe half a day just to learn the basics. The big tip I eventually worked out here was, when I was Googling WordPress tutorials, I needed to set the time range to the last 12 months (or less). WordPress has changed its main editor to a thing called Gutenberg, and if I watched the old tutorials with the old editor, they didn’t make any sense.
Also, I found it much better not to go to the first thing in the Google search results. The top few search returns were always ‘Sponsored,’ and they were always trying to sell me something, and their affiliated-link bots all blinked and beeped and flashed and dragged me in deeper and deeper… often distracting me from what I was looking for. I usually had a much better experience halfway… or more… down the Google list.
Was WordPress easy to use for a beginner?
Even with the right tutorials, the WordPress editor was a little frustrating at first. It didn’t help that most tutorials assumed some working knowledge, and I was a total WordPress noob. But… eventually, I started to get the hang of it.
The lightbulb moment for me was when I realised WordPress really boils down to just a collection of Static Pages and Blog Posts, and you just set up a the styles and templates for those that get applied throughout the whole website… everything else is just gravy.
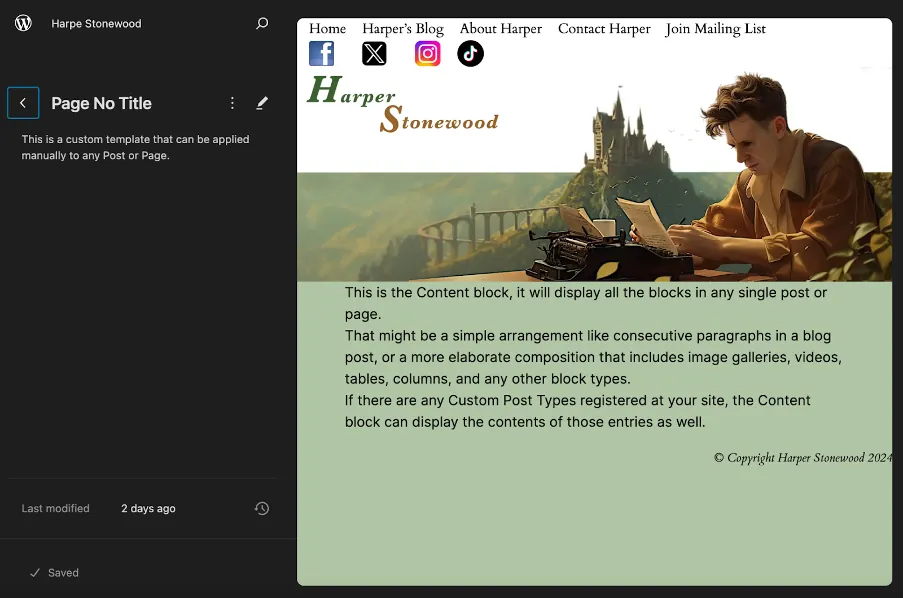
Knowing that the choices I made could easily be applied throughout the whole site using templates, I spent a whole lot of time on the template for the landing page… getting the header and footer and navigation and page formatting just right. Then I used that template and added in the specifics for the landing page.
What came next?
Step 6: making a website blog page
I wanted my site to be essentially a blog with a few extras, so next I planned to build the blog page that would be the heart of the site, but that seemed like the most complicated part, so I just built a shell of the blog page template from the template I made for the landing page and added the blog to the navigation and then went onto some of the easier pages to round out the rest of the site.
Step 7: making a website author bio page
The bio page was next… obviously super important for an author. Since I had my headers and footers and colour schemes, etc, all in my template from building the home and blog pages, the Author Bio was very easy. I just used the home page template and added the author bio notes by cutting and pasting from Google Docs. And yes, it is my actual bio.
Step 8: standing up the extra functions: counter, mailing list, contact page/form
The extra website pages were pretty straightforward, too. I kept the navigation fairly static with a single menu across the top of the header that I used on every page, and I have a single ‘call to action’ button in the middle of each page asking if the visitor wants to read the blog or find out more about me or more about #BlankPageToBookstore.
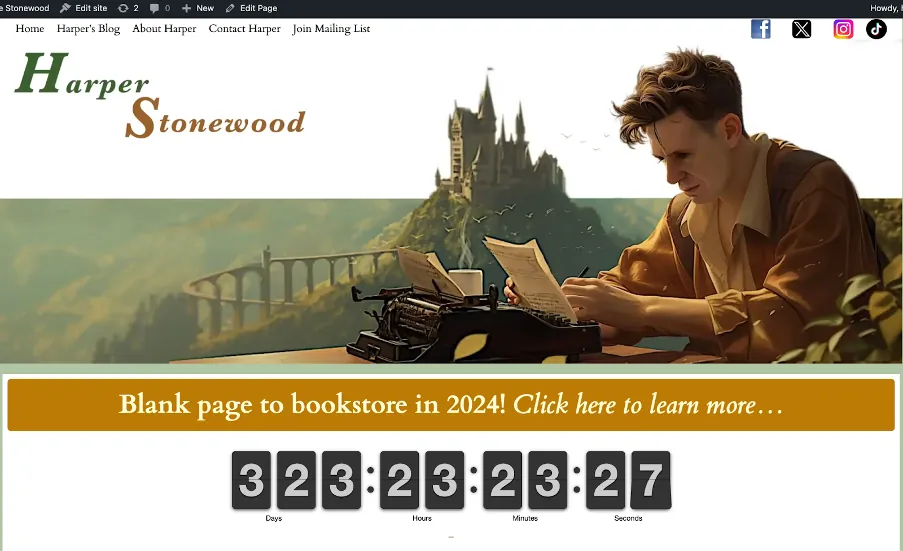
I read that the call to action is important for both helping achieve the objectives of your site but also for Search Engine Optimisation (SEO). Google ranks pages higher if people stay longer at your site, rather than dropping straight back out and selecting something else from the Google search list.
The template I’d already edited made the structure of all the rest of the site easy. The only real trick was I needed was a form for the mailing list and the contact page so people could enter their contact info and I could store it in the WordPress database.
There is no form built into default WordPress. At least, not exactly. It’s worth noting that there are two different ‘flavours’ of WordPress. WordPress.org is an open-source software provider where thousands of ‘volunteers’ create and share the WordPress software entirely free.
Seriously?
Yes, pretty crazy huh?
What’s the other flavour?
WordPress.com, which uses the base WordPress.org software but packages it up with hosting services very similar to an integrated Hosting provider like Squarespace and all the others. But… of course… WordPress.com is not free because of the other hosting services it also provides.
WordPress.com also doesn’t offer all the same plugins you can get for WordPress.org, which makes sense. WordPress.com don’t want a huge range of things outside their control mucking up their nice, clean hosting environment. But they do bundle more things into the base package. Forms being one of those things. But, I was using WordPress.org… the free software… so I didn’t have any plugins installed yet.
So you can’t use forms on WordPress if you get it free from WordPress.org?
What… no… I mean yes… I mean of course you can. It just doesn’t come bundled with it by default, same as it didn’t come bundled with the countdown timer I have on the landing page counting down to 1st of Jan 2025 when my book will be released. Luckily, there are literally thousands of plugins you can install to take care of such things. Many of them are paid services, but there are plenty of free ones.
All I needed to do was install a forms plugin, and I was good to go. I used Gutena forms, which is really simple and seems to work well.
That all sounds like a lot more work than just building the whole site from a text prompt like you did with 10Web!
Yes, it took a lot longer than the Hosted AI like 10Web and other Hosted platforms like Squarespace. But, this way, every image, every word, every widget and block and form and… everything else… was put there by me. That will hopefully make site testing and support and SEO optimising for performance much easier later on.

What do you need to optimise on a website? Every web page pops up in a second or two. What does an extra second matter?
It matters a whole lot if you ever want anyone to find your site. That Search Engine Optimisation (SEO) thing I mentioned earlier, which decides if you site is 1st or 1millionth in a Google search, follows a bunch of algorithms to decide where your site sits. And one of the most important things is… how fast your site loads. Milliseconds matter.
Okay, so is your site fast?
I have no clue. There are a bunch of SEO optimisation plugins that can apparently check, but I haven’t had time to install or run any of them yet.
So, what does your website do exactly?
Step 9: writing some blogs on my website
Not much until I copied and pasted the first three blogs about ‘blank page to bookstore in 2024’ from the Google Doc where I wrote them. Then, voila, content. Other than a blog, it has the pages described above. I could have gotten away with just a blog for what I have so far, but I eventually want to offer books and audiobooks and maybe some videos and… whatever else I come up with. A website gives me that flexibility.

How is the blogging functionality in WordPress?
Superduper. Really. WordPress was originally a blogging tool, so blogging is where it really shines. Once you have set up the website structure and decided how to present your blog… in my case by setting up the ‘single post’ template… then every time you add a new post, it just automatically adds it to all the appropriate parts of your site and makes it searchable, clickable and everythingelseable.
You can make the blog template look however you like and then every new blog (plus all the existing blog) are updated to follow the changes in template. I stuck with the barebones, default 2024 theme for the overall website and then just tweaked the blog template a bit until I was happy with the layout. But there are thousands of very cool themes you can set that radically change the look and feel of your site in a few clicks.
Did you make any other customisations?
Ah… no… I don’t think so. I mean, I didn’t knowingly change anything else. I just set up the templates how I wanted them within the default theme and added the two plugins I mentioned earlier. I could have maybe used an ‘author’ theme of some kind as a starting point but, like I said earlier, I really wanted to go bare bones so I knew what everything was and how it all worked on my site. Maybe I’ll play around with other themes later.
As mentioned earlier, the only things I knowingly added were the plugins. ‘Gutena Forms’ for collecting email addresses and to let people contact me and the ‘Countdown Timer for WordPress Block Editor (Gutenberg)’ that… as we speak… is diligently counting down the seconds to the release of ‘Unnamed,’ my working title for my book this whole #BlankPageToBookstore thing is about.

Any other tricks to the WordPress blogging process?
Yes, one biggie. The default images loaded from documents if you just cut and paste them into WordPress from your Google or Word Doc… are stupidly large. Most of mine were about 2 Meg per image. That is WAY TOO big and makes for terrible website performance and therefore terrible SEO.
I had to go through all the images and downscale them in GIMP (free image editing software similar to Photoshop). I reduced most of them to 5-10% of their original size without any noticeable loss of quality. That is a very big deal for SEO when I have so many images in my blogs.
I tried installing a few of the image optimiser plugins for WordPress to see if they would solve the image sizing problem, but they only reduced the images by about 10%, whereas manually I reduced them by more than 80%.

That all sounds very fiddly. Maybe you should have just gone with Squarespace.
(Laughs…) it is actually one of the main criticisms of the fully hosted solutions… that SEO is poor relative to well-tuned, self-hosted websites. A lot of the control of what happens behind the scenes is managed by the host, which simplifies things, but you just have to live with the SEO outcomes the host offers.
In my self-hosted case, I know everything that has been added to my site and why it’s there. And, hopefully, once I’ve installed some of the site-tuning tools, I will know how well they are performing and will be able to tweak things as necessary.
And so your site is live?
Yes… though that was all a bit fiddly and stressful, I must say.
How so?
Step 10: installing WordPress on host
Well, I had to install the WordPress.org free WordPress software on my site at Hustly (my site was built on my local machine, remember) before I could migrate my site to the internet. Hustly is a WordPress host (not all hosts are – important to check), so it was very easy. Literally one click to get it started and then a couple of clicks to choose some options and WordPress installed itself.
I chose to install WordPress Essentials (a basic set of plugins offered at Hustly) as part of the install because it contained some additional SEO optimisation and Security features I thought I might need eventually. I was also able to choose those extra couple of plugins I mentioned earlier that I’d installed on my LocalWP site as part of the install, which saved me needing to find and install them later.
I did make one mistake in the WordPress install process. I wasn’t sure I’d actually clicked the INSTALL button because nothing seemed to happen, so I clicked it again, and I ended up installing 2 WordPress sites. You can do that if you want to, but I didn’t want. I deleted them both and started again to make sure I didn’t end up with rogue pages pointing across two sites. My own impatience aside… it was all very simple.
Step 11: launching site
Going live did get more complicated… well… no… my impatience while going live made it seem more complicated… an emerging theme here. I needed to point my domain name from my Domain registrar (Hover) over to Hustly so that the Domain Name System at Hustly would find and connected with my domain… making the site accessible on the internet. I know that sounds a bit complicated, but the steps to do it were actually very straightforward, though I managed to make them look hard. I became a bit unstuck.

How so?
Well, I followed the instructions on the Hustly documentation, and it seemed easy even though I had no clue was really going on. I needed to add these things called ‘glue records’ at my registrar so Hover would point back to the Domain Name System at Hustly. I did that, and… nothing happened. My website was missing… presumed dead.
Not ideal. What did you do?
(Laughs…) I panicked. I realised I was totally out of my depth and I had made a terrible mistake and I should have just gone with SquareSpace. (Laughs again…) I’m only half joking. I spent the next three hours on ChatGPT trying to work out what I’d done wrong. I kept going over it and over it, and it all seemed okay.
Then I saw this notice on Hustly about a thing called ‘propagation,’ which just means that it takes time for the updated registrar information to be shared with the computers that host the internet around the world. Most forums said this happened pretty quickly… 20-60mins, but the Hustly documentation warned it could take up to 48 hours.
Even so, I continued to panic and fiddle and twiddle. I installed SSL security tokens, and I activated an external Content Delivery Network, and I cleared cache, and I rebooted and… nothing made my site any less dead.
Just when I was sure I had wasted a week of my life and was looking up my login details for my trial Squarespace account… HarperStonewood.com popped up on the internet, fresh-faced and itchy to get started. It ended up taking about 30 hours to propagate from launch to being available. I really did just needed to be patient… never my strong suit. I did worry that my onging changes/edits to my website would be a nightmare. But, the huge propogation delay turned out to be just for the Registrar config changes. Ongoing edits to the site are almost instantaneous.
Then I re-installed SSL encryption (the S in the “HTTPS” in secure web addresses) to stop the site throwing up security warnings – never a good look. That was easy once the site was live – you can’t do it before the registrar information has been propagated like I tried to do. Hustly offers unlimited SSL tokens as a free service – many hosts don’t.
What came next?
Next, I set up the email for Harper@HarperStonewood.com so the relevant links in my website had somewhere to go, and so I had an email address for verification for setting up my social media platforms. Hustly offers an email service for a single email account, so I used that one.
Email setup and configuration was very easy through the admin tool that Hustly offers called Plesk (one of the industry standard tools).There is some debate about having your website host your email rather than using a dedicated third-party email service provider, but I’ve started there for now.
I might set up an external email provider at some point if I need to manage huge mailing lists or whatever. To actually use my email, I have just linked the Hustly hosted email as an IMAP service (using Harper@HarperStonewood.com) back to my phone (by adding new account in the default iPhone mail app).
Hustly provide online instructions for setting up email. They even offer a QR code to automate the process. But, the QR didn’t work for me. I had to do it manually.
Even manually, the email setup on my phone was pretty straightforward. Though, it took a few goes before my phone picked up the new account. It kept timing out for some reason – not good for my impatient tendencies. But it worked on the 3rd or 4th go.
I’m not too fussed about email yet. I have 2 people signed up in my mailing list… both me (laughs…), so I can manage my entire email list okay just by silently thinking…

Though, I read you should build your mailing list from day one… so that’s what I’m planning to do. If anyone actually ever signs up (smiles…), I will get an email sent to my phone with their details. That will be tres exciting!
And so you’re done? Your website and blog and email and whatever are all up and running?
Yes. Though, there were also a few tricks to bringing the Localwp WordPress site online.
Do tell…
(Smiles grimly…) again it actually ended up being pretty straightforward, but that wasn’t for the lack of the internet-at-large making it seem very complicated.
In what way?
I Googled how to make my site live. It was still just the default WordPress install online. My ‘real’ website was still on my laptop. Google returned every tool and 50-step technical process under the sun for go live.
Then I went and checked with Localwp themselves… the company that offer the free local hosting software… and they said it was up to the host how go live needs to work. But, the Hustly doco didn’t have anything particularly useful… presumably because it’s just one of those things that people who manage websites should intuitively know.
Next, I went to Plesk (the Hustly hosted control panel that WordPress sits behind) and it had some very complicated looking processes that I was pretty sure… with one false move… would kill my site beyond my ability to resuscitate it.
Finally found a Google tip that said to just migrate using WordPress itself. Though, it turns out you can only do part of it with the inbuilt WordPress tools. You need to add some plugins and fiddle around a bit to do all of it, but the plugins were free and easy.
The steps I followed were to use the native file export in WordPress from my LocalWP site. This was available by default… no plugin needed.
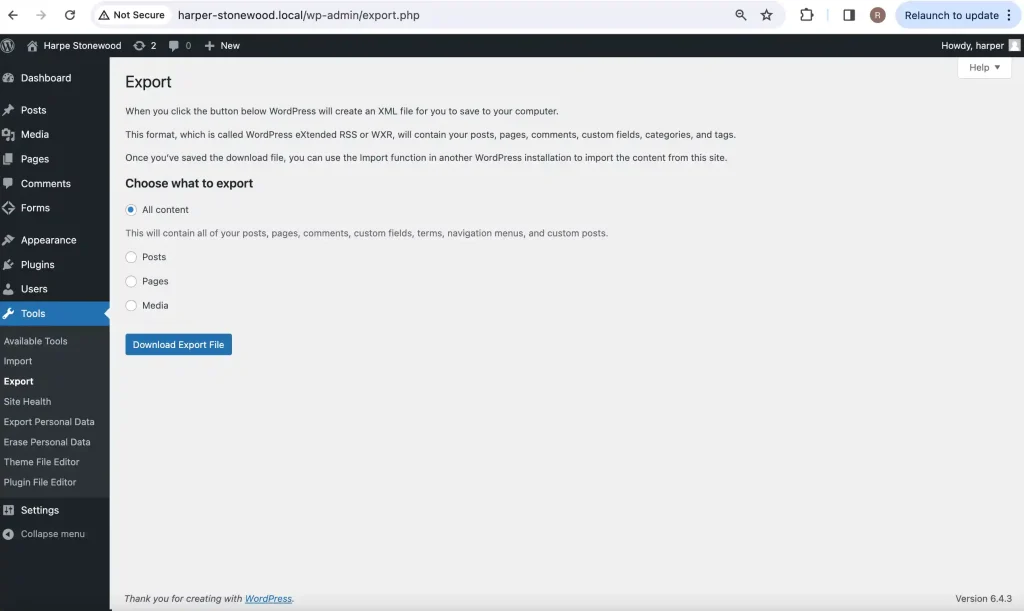
This created an XML file on my desktop with all the pages and posts from the site I built.
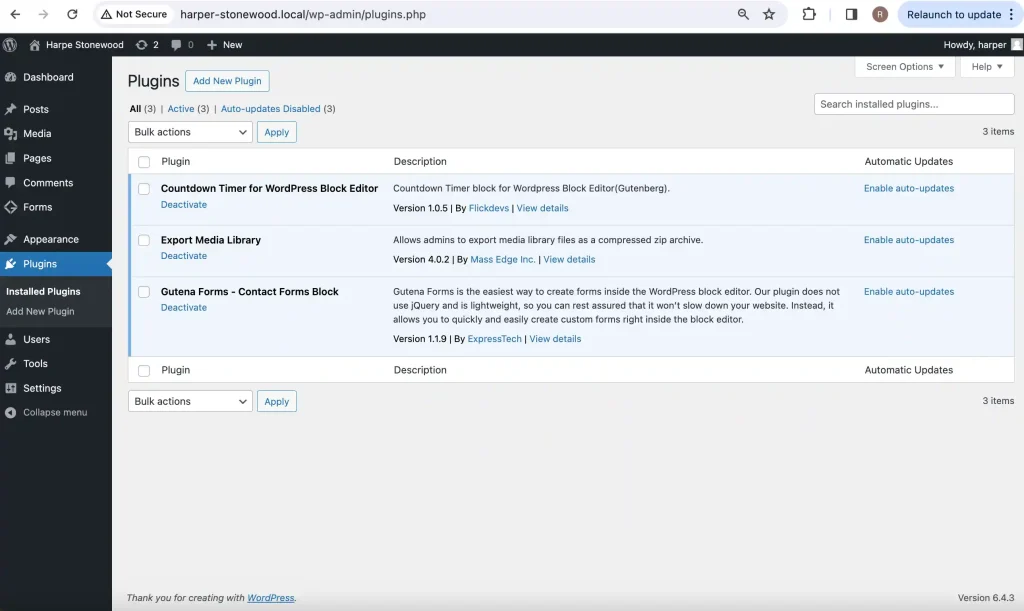
Then I had to install a plugin called Export Media Library on my LocalWP installation of WordPress to export the Media (photos) to a folder on my laptop.
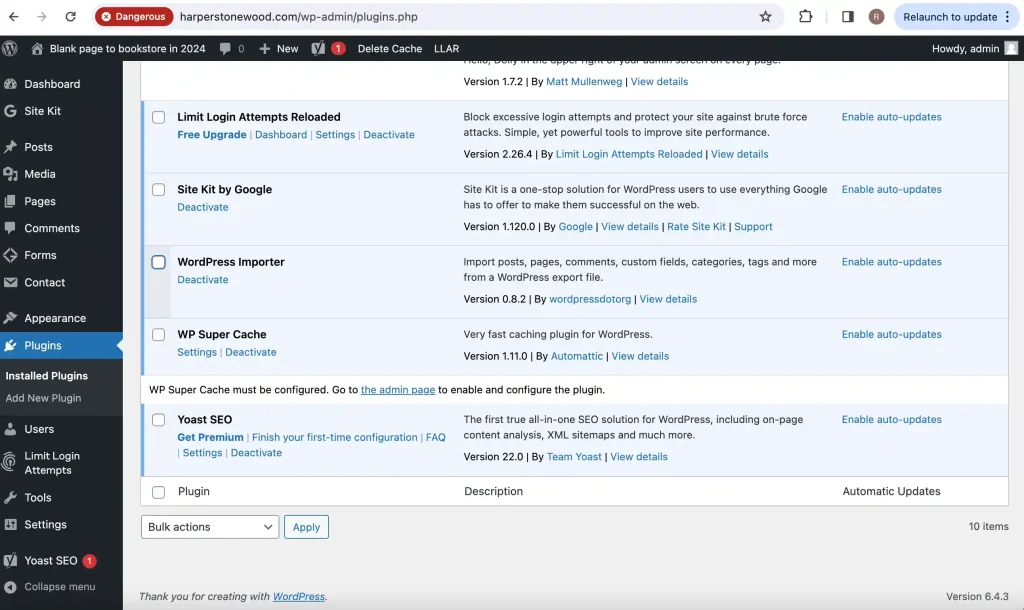
Then I installed a WordPress file importer plugin called WordPress Importer on my Hustly hosted version of WordPress so I could import the XML file (I exported earlier) to my host from my laptop.
Then I just uploaded the media files (photos I exported earlier) from my laptop into the Media storage on my Hustly hosted version of WordPress.
This is default WordPress functionality, and I knew how to do it because I had to import all the photos to build the blog pages and site layouts in the first place.
That gave me my pages and posts and photos uploaded onto my host. A great start.
Just the start? Seems like the end point.
Unfortunately, no. Everything was on my site, but it was broken.
Broken… in what way?
Firstly, I noticed that some of the exporting and importing hadn’t full worked. Some of the images didn’t export from local or didn’t import to host, and some others were duplicated, and none of the images had been picked up by the pages or posts by default… and the landing page was still showing the theme default, not my page… and the links on every page still pointed back to the LocalWP install, not the hosted pages, so none of the pages worked.
So… broken in pretty much every conceivable way?
(Laughs…) pretty much, but it ended up being no big deal. The odd duplicated or missing photo was easy to fix by manually deleting or uploading individual images, and the landing page was an easy setting change under Settings/Reading in WordPress.
Then I went to where the photos should have been in each of the online pages and blog posts and replaced each of the dead image links with a link to a live image in the hosted media library. All very easy using default WordPress functionality.
Luckily I had meaningful names for all my images in the media library. That saved a ton of mucking about finding the right image. Then I just went to all the dead links in the pages and blogs and updated them with the online path “harperstonewood.com” rather than “harper-stonewood.local” to get them working and… hopefully… everything is working okay now. I still need to do a bit of testing to be sure, but it all looks okay.
How long did that all take?
Maybe an hour. Perhaps the more-complicated looking approaches for migrating local site to host that I saw before doing it this way would have short-circuited some of that. But, I was happy using my approach as it was using tools I was already familiar with, so I wasn’t worried I might accidentally kill the whole site and not be able to get it back.
So the website is all done?
(Laughs…) not by a long shot. Going live only covered up to Step 11 in my build a website plan. Though, I’m not too worried because most of the other things are around testing and fine-tuning and improving things that will probably go on for the life of the site, so they were never going to be finished in the first week. I will document anything important in future blogs as I better understand them.
The first things I need to tackle will be around security. The site is showing some warnings about vulnerabilities to various form of cyber attack. I don’t care too much now, because I still have very little to lose, but I will be doing all my blogging and new page building on the live site from now on, and I will start to capture people’s email data and… possibly… eventually other essential information for selling books or whatever else, so I am going to make sure the security is water tight asap.
What are the other remaining steps?
Step 12: decide any social links & additional blog share formats: podcast/ YouTube/ TikTok/ etc., and link or reserve space
Step 13: set up SEO Metadata
Step 14: set up performance monitoring tools
Step 15: implement security protocols: confirm SSL certificates, set site security features
Step 16: confirm mobile optimised: ensure the site design is formatted correctly and responsive to mobile devices
Step 17: email setup: If using a professional domain-based email
Step 18: privacy policy and terms of use pages: especially if collecting user data
Step 19: legal compliance: check for GDPR or other compliance if necessary
Step 20: user experience (UX) testing: to identify any navigation issues or design flaws
Step 21: analytics setup: set up Google Analytics or similar for insights
Step 22: load time optimisation: further optimise images and other element on pages and posts for increased speed
Step 23: feedback mechanism: decide on methods of collecting user feedback in addition to contact page
Step 24: website backup: set up regular site backups and test them
Yeah, right.
Yeah.
Did someone say Squarespace?
(Laughs…)
What do you have on the master plan for next week?
Standing up the social media platforms.
I thought they were already linked to your website… in your page template.
Yes, I registered on the main socials so I could set up the links to them on the website before it went live, but they are not doing anything yet. I need to work out how to use them. You know… images for Instagram, videos for TikTok… whatever else for whatever else. Plus maybe a whole lot more. Social media is really a blind spot form me. I barely use Facebook… or Meta or whatever it is now.

Can’t wait to see how the week pans out.
Yeah, me too.
How are you feeling about it all?
Still pretty daunted. This week was way more work than I’d planned. And I brought forward my publishing date for ‘Unknown’ to 1st of January 2025, so I’ve effectively lost a month of my original plan which had it scheduled for Feb. And I didn’t do any writing… other than blogs… all week… rare for me.
Ouch…
(Winces…) yes.
Let’s see how you’re feeling next week… maybe the social media stuff will be easy.
(Laughs heartily…) yes… that’s why most authors fear it more than death.
(Laugh together…)


